This area is transparent.
Clicks will pass through to Unity UI below.
```
## Conclusion
This transparency clicking through system works on iOS and Android, providing a reliable way to create immersive experiences where web content and Unity UI can coexist seamlessly.
---
### Trouble Shooting
# Trouble Shooting
> UniWebView build errors and runtime crashes can be resolved by adjusting settings in Unity Preferences and performing a clean build.
## Android
### Building Error
In most cases, it might be some errors saying "duplicate class" when exporting for Android. It happens if you have another package already adding the same package UniWebView requires.
UniWebView mainly needs two packages as dependencies:
- Kotlin standard library ([org.jetbrains.kotlin:kotlin-stdlib-jdk7](https://mvnrepository.com/artifact/org.jetbrains.kotlin/kotlin-stdlib-jdk7))
- Android X Browser ([androidx.browser:browser](https://mvnrepository.com/artifact/androidx.browser/browser))
By default, UniWebView will detect the Gradle file and add both automatically.
However, if any other package in your project is already adding the same libraries in an undetectable way (such as embedding them as a part of the library file, or downloading the duplicated package into "Plugins/Android" folder), UniWebView will fail to detect them and add duplicated packages.
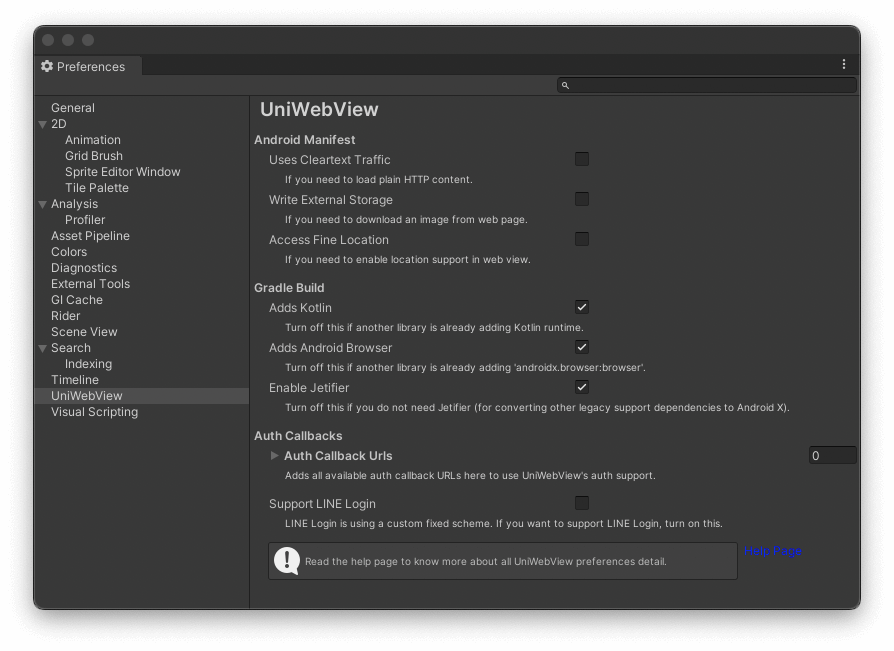
Most of the issues can be solved by adjusting the settings under the **"UniWebView" section**, which in the **Unity Preferences** panel. Press the "Settings" item in Unity's menu and open it, then follow the instructions below based on the error you have in the Unity console or Android log.
::: tip
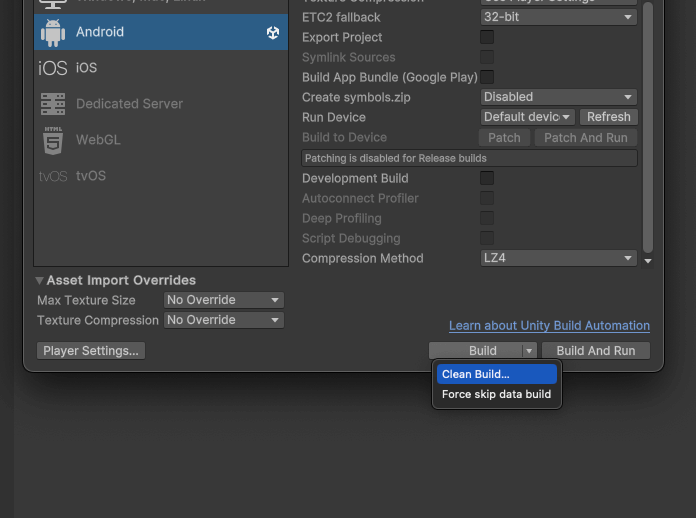
In almost all cases, it is important to perform a Clean Build after you change the settings. You can find it in the dropdown menu in the "Build Settings" window.
:::
---
::: danger Building Error
"Duplicate class androidx.browser. ... in modules (androidx.browser:browse)"
:::
1. Turn off "Adds Android Browser".
2. Turn on "Adds Android X Core". (It appears when "Adds Android Browser" is off)
3. Perform a Clean Build.
---
::: danger Building Error
"Duplicate class kotlin..."
:::
1. Turn off "Adds Kotlin".
2. Perform a Clean Build.
---
::: danger Building Error
"Duplicate class android.support.v4.app ..."
:::
1. Turn off "Adds Android Browser".
2. Turn on "Adds Android X Core". (It appears when "Adds Android Browser" is off)
3. Find and remove the legacy support package from your project. Usually it is a jar file containing `android-support-4.0` or similar in its name, under your Plugins/Android folder.
4. Make sure "Enable Jetifier" is enabled. Your packages depending on the legacy support package will be converted to Android X automatically.
5. Perform a Clean Build.
---
### Runtime Crash
::: danger Crash
"Unable to get provider com.onevcat.uniwebview.UniWebViewFileProvider..." on app launch
:::
1. Check if "Adds Android X Core" is enabled (it appears when "Adds Android Browser" is off). If the "Android Browser" is not added, UniWebView will require this package to work.
2. Turn on "Adds Android X Core".
3. Perform a Clean Build.
---
### Uploading
# Uploading
> UniWebView supports file uploads from device or cloud, with specific iOS setup required for camera access.
UniWebView supports uploading files from the disk of your device or from a cloud service to your website.
To show an upload field, use the standard input tag with proper type:
```html